
Wired Debugging on a Surface Tablet? Yes You Can!
Ah.... no.
Sorry.
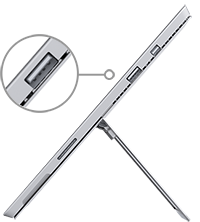
It's not that kind of USB port. You can't just stick anything in there, man.
To debug on a Surface (or devices that do not have Visual Studio installed) you must install the Visual Studio Remote Debugger client app on the device and then wirelessly communicate with it to debug from Visual Studio on your laptop. The version of the remote client app MUST match the version of Visual Studio you’re using (update 1, 2, 3, etc.). Directions to do that is here
There is a major issue with this plan, however:
More and more apps we’re building need to be offline capable. So how are you supposed to debug in an offline scenario with wireless debugging? That’s where that USB port is going to come in handy.
Also, another benefit of debugging over a wired connection is that it’s a bit more reliable and faster to get the app running after each build.
One thing to note: like a lot of mobile developers, I work all day on a MacBook Pro and use Parallels that runs a Windows 10 Virtual Machine so I can use all my Windows tools side by side - so this post is written from that perspective.
Hardware Needed
In order to debug over a wired connection, you’ll need a few things:
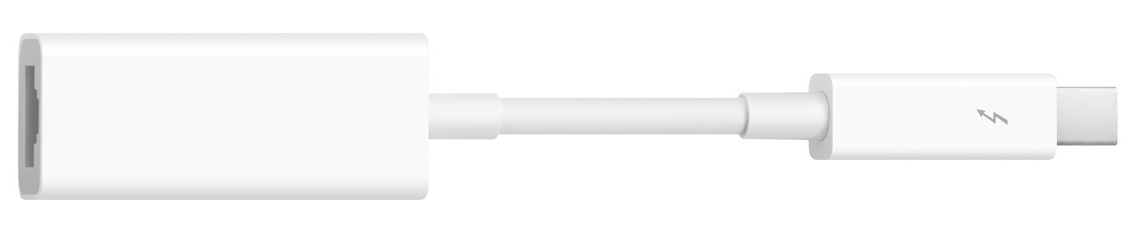
- 2 USB to Ethernet dongles. You can find them for pretty cheap on Amazon.
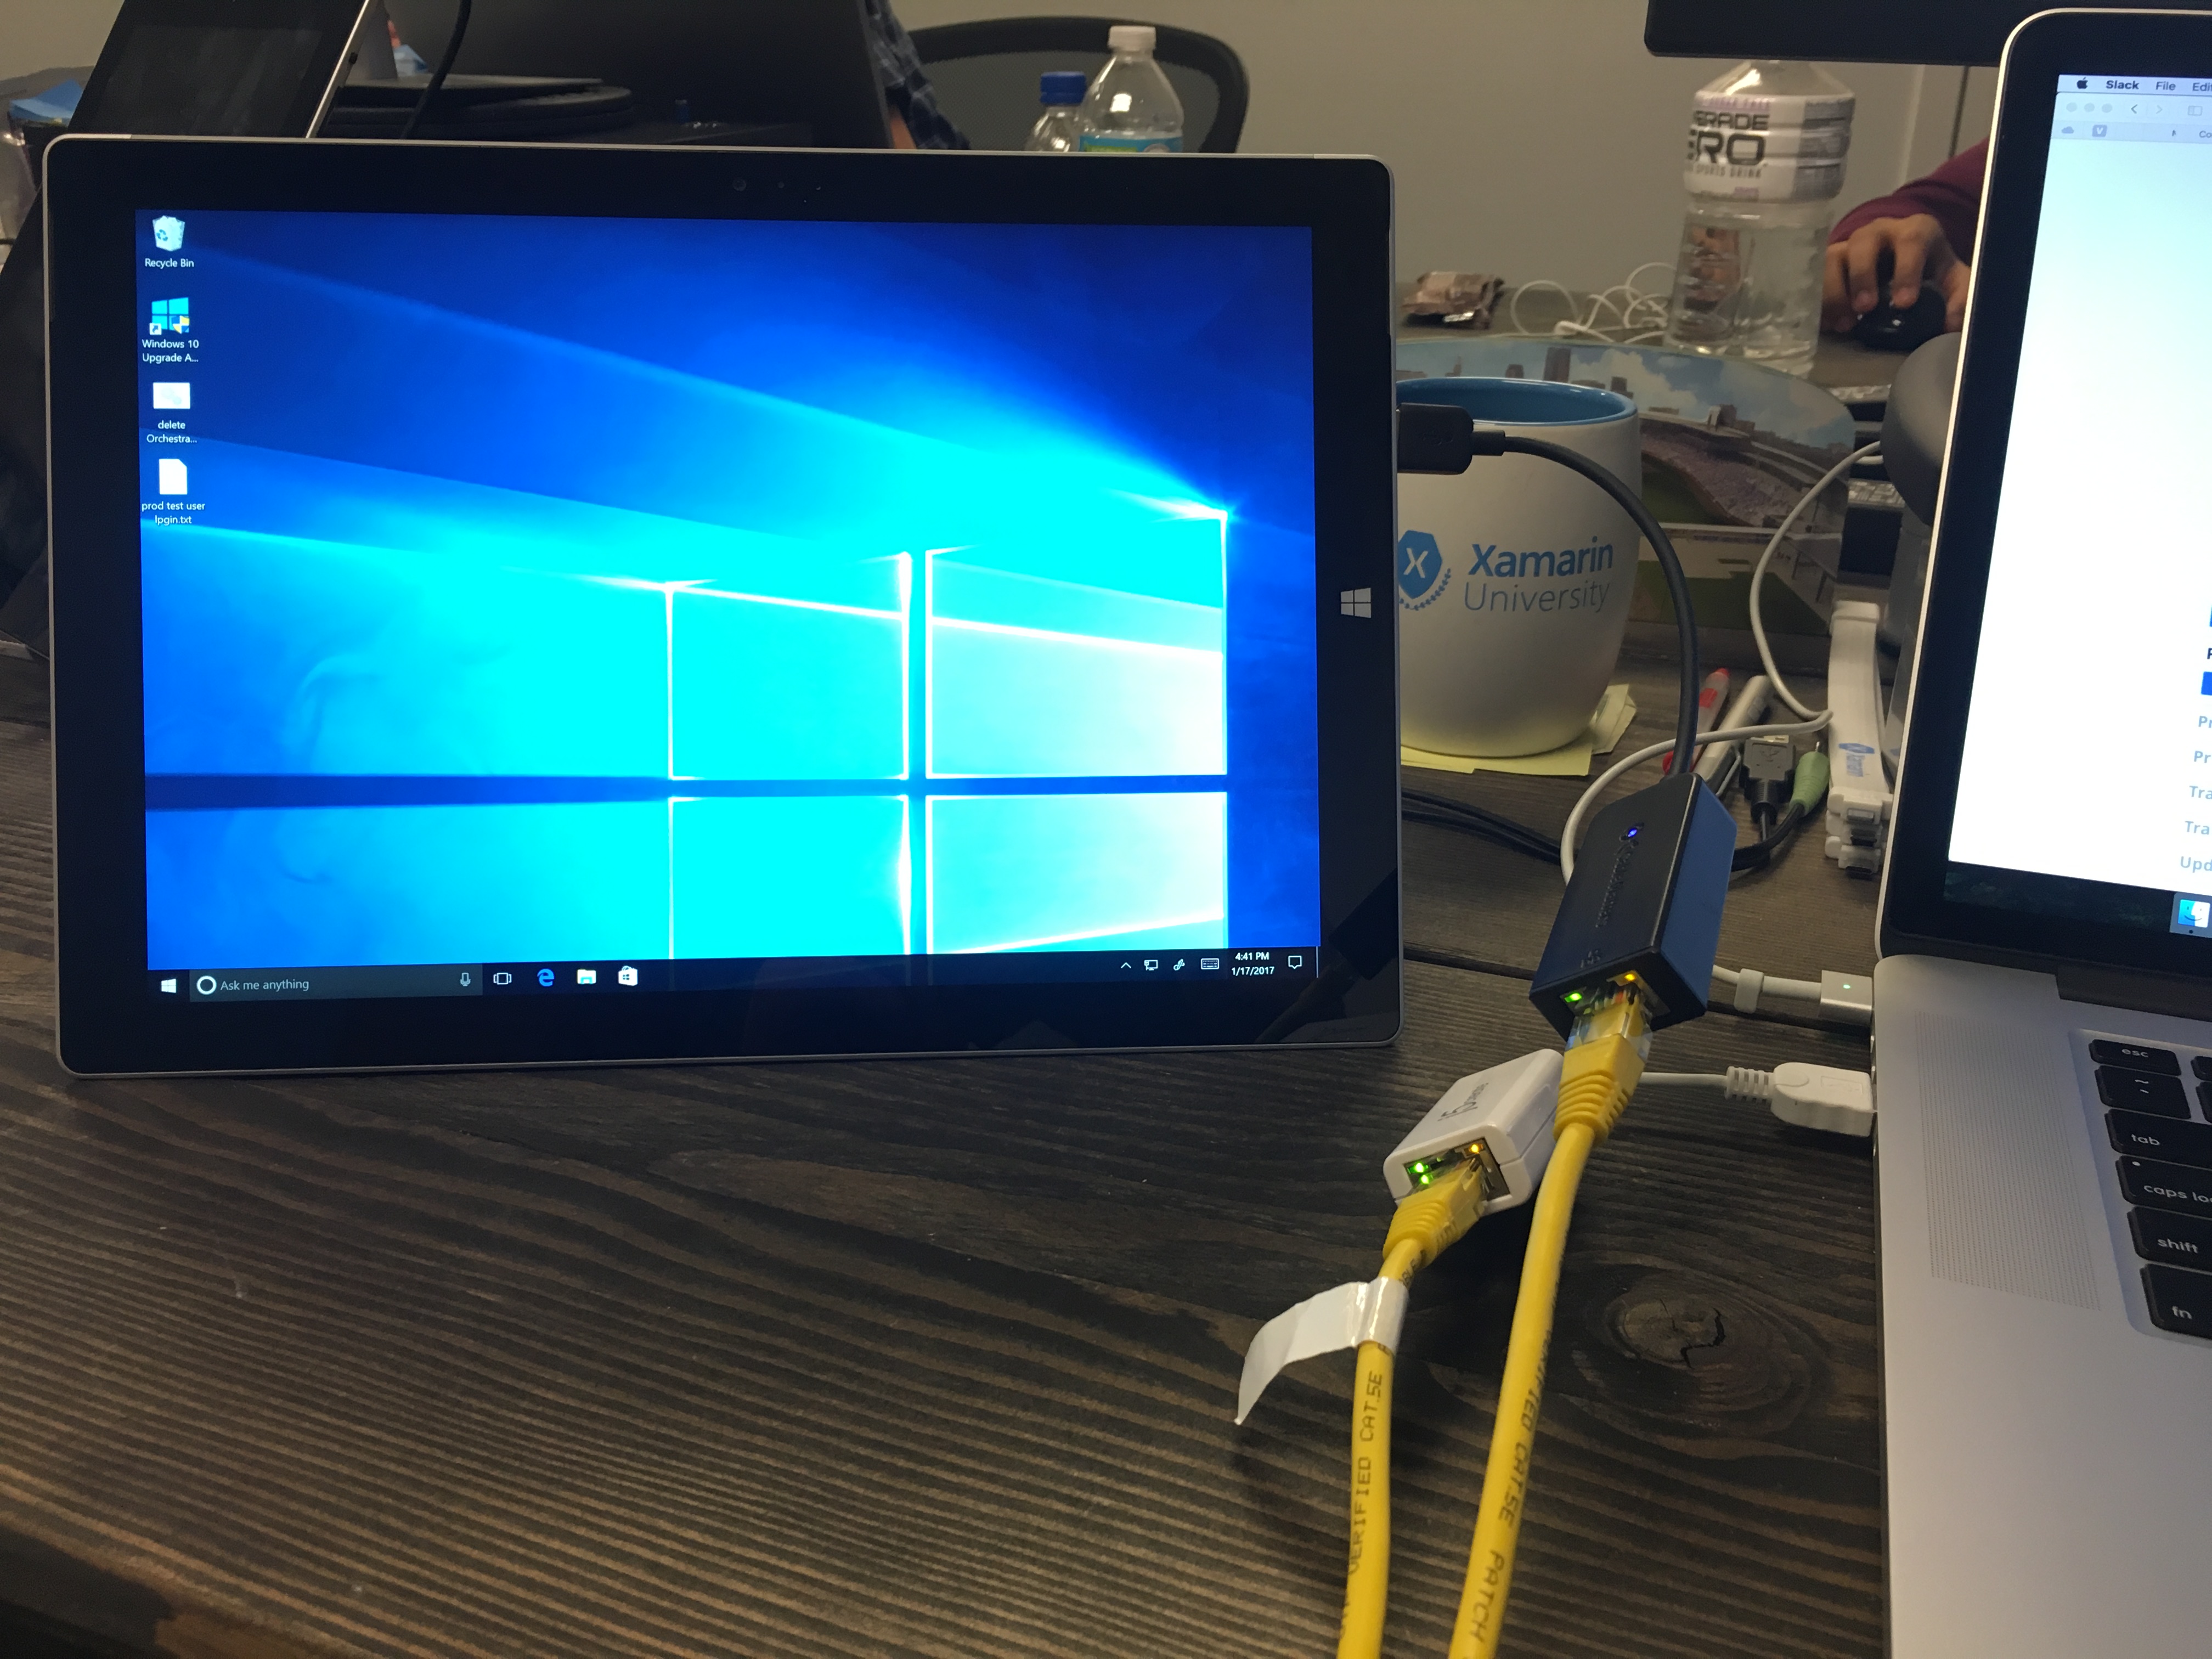
- A length of cat 5 cable to connect the two dongles together.
What won’t work here is one of those fancy (and 3x more expensive) lightning to Ethernet dongles plugged into my Mac, because my Windows VM doesn’t recognize it. The USB adapter is the one Windows understands.
Here's what it should look like when it's all hooked up.
Debugging Online and Offline
For our Xamarin.Forms app, we need to be online the first time a user logs in and syncs data with the server, but then we want to disconnect from the internet to test offline scenarios after that first login.
The trickiest part was getting my laptop to share its internet connection with the Surface over my wired ethernet connection. When you first connect your Surface to your laptop, if you turn off the Surface WiFi connection you’ll see an icon indicating that there is no internet connection.
Thankfully, there’s a nice Windows feature that allows you to do that called Adapter Bridging.
Here’s how to do it:
- Open Network Connections on Windows
- Locate the adapter that is supplying your internet connection. With Parallels this is done by an Ethernet adapter
- Select both the adapter from step #2 and the one for your plugged in USB dongle
- Right click and select Bridge Connections
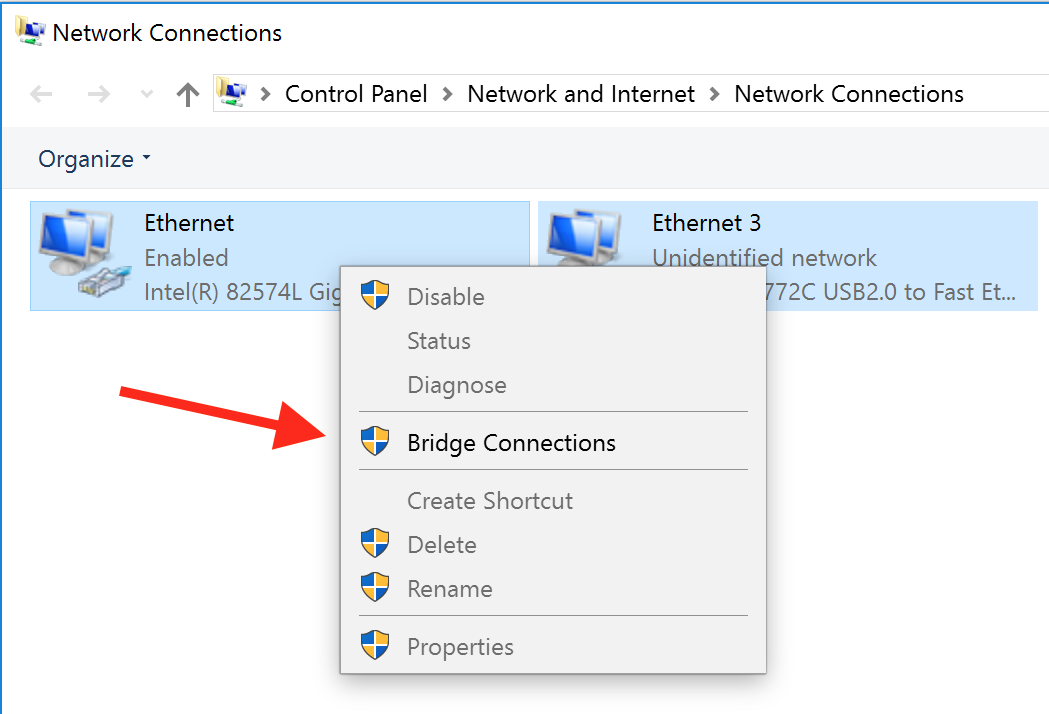
The internet connection will now be shared over the ethernet cable to your Surface device
Start debugging while online:
- Bridge adapters
OR
You can always simply unplug the USB adapter dongle from the Surface and turn WiFi back on. - Open browser on Surface to check for connectivity
- Get the Surface’s IP address (cmd > ipconfig)
- Enter the IP address in the Remote Machine textbox in Visual Studio. Format is xxx.xxx.xxx.xxx:[Port Number]
- Run on Remote device
Then offline:
- Select adapters, right click, select Remove from Bridge
- Wait for Surface to get new IP
- Type it in the Remote Machine textbox in VS
Tips
-
When Un-Bridging. The Surface will show that the internet connection is lost right away and long before it gets a new IP, so wait for the USB Ethernet adapter to show that it has a new (different) IP before trying to debug to it in Visual Studio.
-
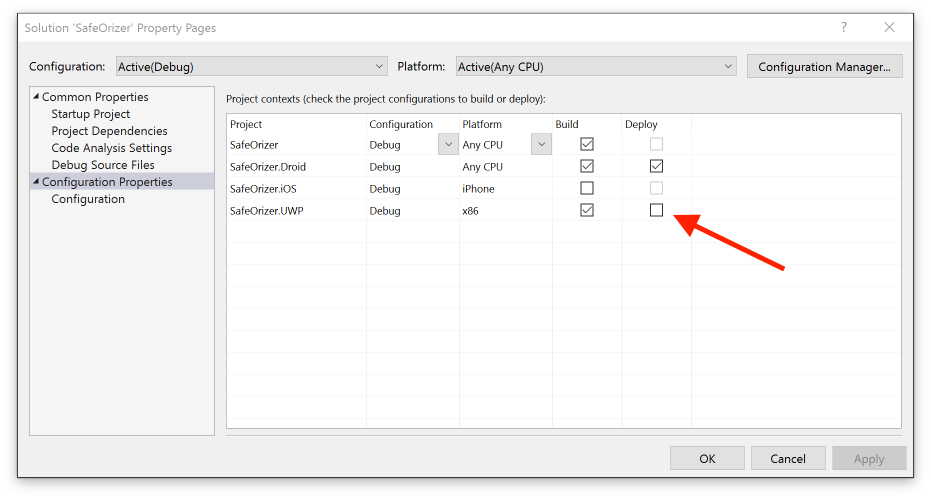
Generally, you’ll have your Solution build configuration set to deploy the UWP head project to your device each time you start debugging the app. That means the app will be installed over the old one on each deploy and that can be undesirable when testing offline behavior, so don’t forget to uncheck that if needed after the initial deploy of the app to the device.
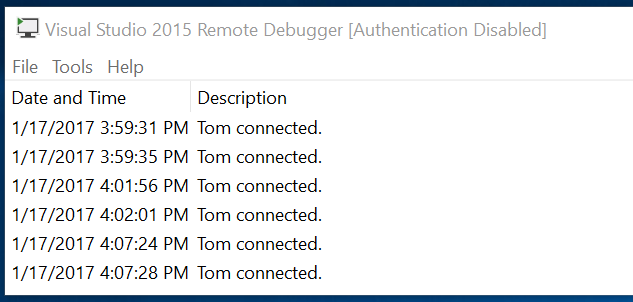
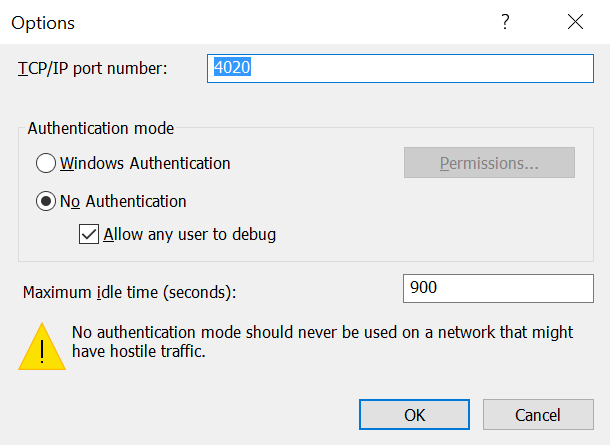
- I always turn on these two options in the VS Remote Debugger app running on the Surface (under Tools menu > Options):
- No Authentication
Turning this off seems to alleviate a lot of the hassle of trying to get the debugger to connect to the remote client app. I debug on a private or wired network and only have the remote client running when I need to debug, so the lack of security doesn’t concern me here. - Allow any user to debug
I use this setting because don’t log into my Windows 10 VM via Parallels so I’ve had an issue with that. I also use this when my coworker needs to debug on the Surface.
- No Authentication
- If you find yourself switching from connected in disconnected frequently, it’s a pain to keep typing in the same 2 IP addresses over and over in the Remote Machine textbox. Undo (Ctrl + Z) works inside that textbox.
Guiding Principles
-
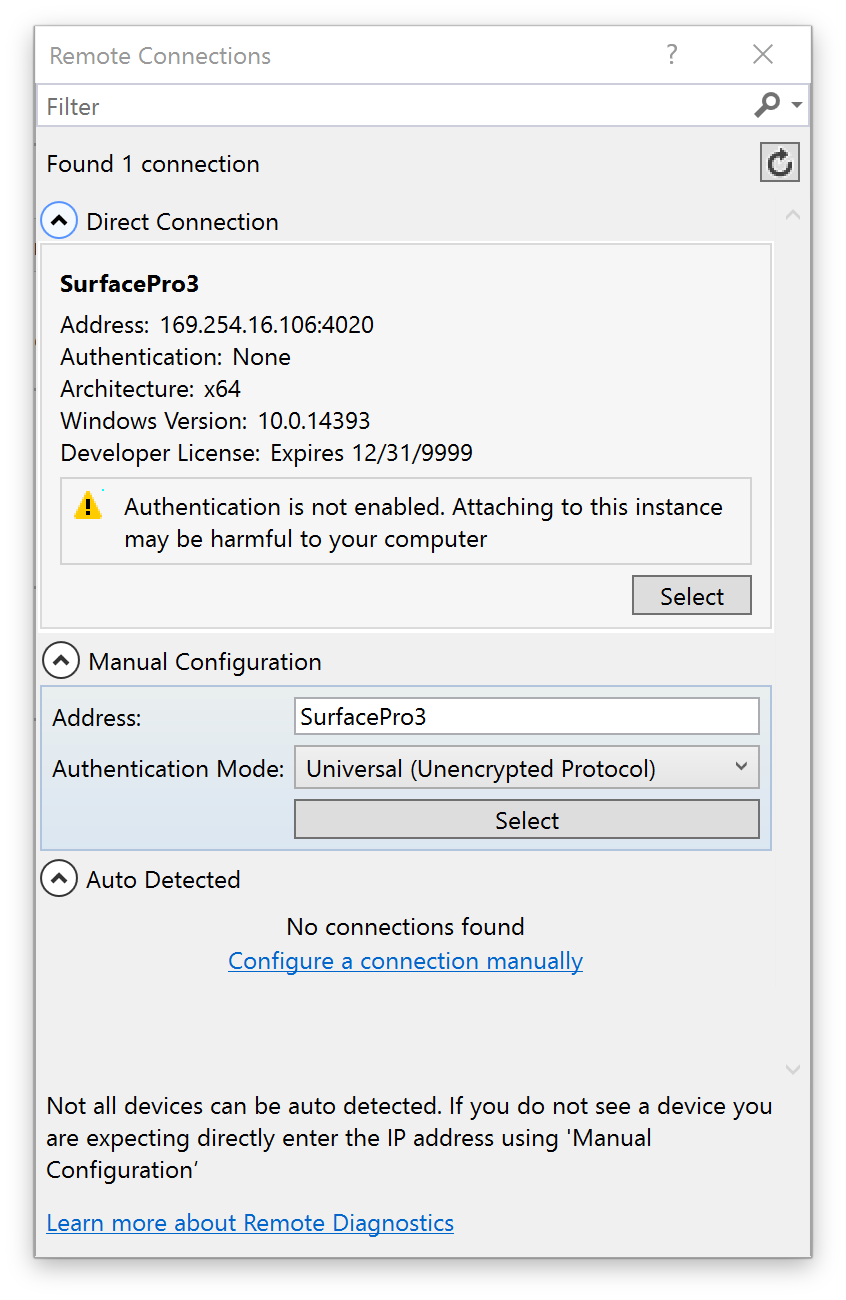
Don’t live or die by what the Remote Connections dialog is able/unable to find. It’s nice when it finds your device, but often it doesn’t. So if you’ve got things hooked up correctly, just type the IP + Port in the address box manually. Remember to use the correct format: ip.addr.goes.here:[port number]
-
You must have the Visual Studio 2015 Remote Debugger app running on the Surface at all times. That app will close automatically after a certain period of inactivity.
Common Errors
Error: Unable to connect to the Microsoft Visual Studio Remote Debugger named ‘10.211.55.5:4020’. The Visual Studio Remote Debugger on the remote computer is running as a different user.
Fix: On the Surface, in the menu for the VS 2015 Remote Debugger app, go to Tools > Options, and check the Allow any user to debug option, under the No Authentication radio button.
